Rebekah's Top 4 Self-Tanners

bronzer1.jpg

Want a beautiful tan, but don't want to lay out for a gazillion hours or roast in a tanning bed? Self-tanners are a great way to get the look of being bronze without damaging your skin. The four following self-tanners are tried and true and will not leave you orange or streaky. Instead, you will be wishing you would have started sunless tanning a long time ago. St. Tropez Self Tan Bronzing Mousse is my go-to self-tanner. It is a lightweight velvety mousse with a built in color guide that makes tan application easy and virtually goof proof. It is one of the few self-tanners that does not have a strong after smell. It gives a beautiful, rich, bronze tan. As with all self-tanners make sure you apply it using gloves! St. Tropez has a mitt that you can buy in addition to the self-tanner that works great.

Fake Bake Sunless Tanning Mousse is another favorite of mine. Like St. Tropez, it has a built in color guide so you can see exactly where you are applying your self-tanner. It is streak free and easy to apply. It also, boasts special organic ingredients which is always a plus!

I recommend a self-tanner that is made specifically for the face. Lancome Flash Bronzer is excellent. It gives your skin a radiant, sun-kissed glow.

Loreal Sublime Bronze Self-Tanning Towelettes are a budget friendly, cheaper alternative to the above self-tanners. They are extremely easy to use and are great for travel.

Self-tanners are a quick and easy way to look like you just came back from a luxurious vacay in the Virgin Islands. They give you a beautiful bronze tan without exposing your skin to the sun's harmful rays. Be a bronzed beauty instantly with these all star self-tanners.


Happy Tanning!

Rebekah

Summer 2013 Trend: Bright Matte Lips

final.jpg

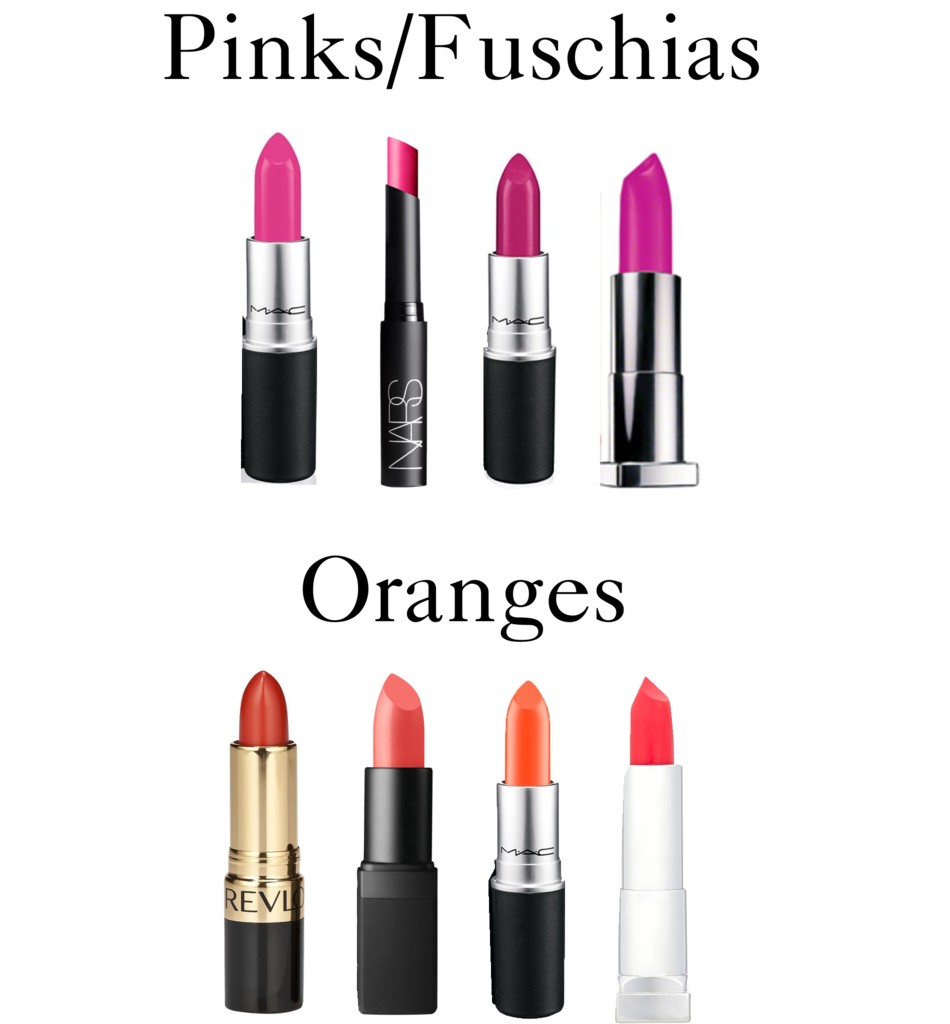
Bright lips are a huge fashion statement this Summer. Fashionistas everywhere are trading in their standard nude lipsticks for bold fuchsias, pinks, and oranges. Celebrities are rocking this look on and off the red carpet. Emma Stone is a trendsetter who is regularly inspiring us with her bold lipstick choices. She is not afraid to take risks and she looks great! c950x805

The key to pulling off this fresh and modern look is to keep the eye makeup minimal. A neutral eye shadow with a slight winged liner, mascara, and a subtle cheek color, make  your lips the main attraction. If you want to branch out and try these celebrity looks, the below lipsticks are a great place to start.

c950x1024-1


Whether you are sporting a casual or dressy look, a bright lip is the perfect accessory this season. The next time you are looking to add a certain "je ne sais quoi" to an outfit, it can be as simple as applying the right shade of lipstick. Have fun rocking this bold and colorful trend!


Happy Styling,

Rebekah

Pinks/Fuchsias:

MAC Candy Yum Yum, Nars Carthage, MAC Girl About Town, Maybelline Fuchsia Flash

Oranges:

Revlon Siren, Nars Heat Wave, MAC Morange, Maybelline Electric Orange


Color Block Nail Art

IMG_8054-2EDITED.jpg

Nail art is THE THING TO DO right now! If you spend anytime on Pinterest or Instagram, you will see countless images of nails decorated with everything from glitter to chevron patterns. You will also find an endless sea of DIY nail art tutorials. Nail art was all over the runway at New York Fashion Week and will be a top trend this Summer. To achieve the above look, you can either take the picture to your local nail salon and have them re-create it. Or you can do it your self!

Here is how you can re-create this look on your own:

  1. Start by picking three colors. You will need one light shade for the base,  one medium shade, and one darker shade. The colors above were all OPI colors: “Sweetheart", “French Quarter For Your Thoughts" , and “Black Onyx.”
  2. Paint on two coats of the lightest shade as a base.
  3. Take the medium shade and sweep it from left to right across your nail.
  4. Take the darkest shade and sweep it from left to right across your nail.
  5. Paint on a top coat. And let your nails dry.

It takes a steady hand to do this. If this is too hard for you, tape strips can be cut and placed on the nail to serve as an outline to keep the lines straight. Make sure each coat of polish is dry before you put the tape strips on your nails!

Nail art adds a fun twist to your regular one color manicure. Have fun playing with different colors and patterns. Branch out and use nail art as a way to accessorize this season.


Happy Styling!

Rebekah

Photo by: Reagan Miura

Rebekah's Top Five Mascaras

last1.jpg

Mascara is truly a girl's best friend. With just a few strokes, it can enhance, brighten and open up the eye. When I ask a woman what beauty product she can’t live without, nine out of ten times she will respond with “MASCARA!” It is a quick and easy step that is a MUST for every woman's daily makeup routine. Here are my top five mascaras that I have personally used and loved.

Article by: Rebekah Miura

Above mascaras left to right:

1 | 2 | 3 | 4 | 5

How To: Tight Curls Tutorial For Prom

Searching for the perfect prom hair style?  Team member, Delaney, shows us how to get the perfect curls for the perfect night!  There are many products you could use to accomplish this look.  What products do you use to get your curls to hold tight throughout the night? Still trying to put together your total look for Prom?  Click the links to see our posts about  Prom Makeup &  where to find the best Prom Dresses!

Video by: Delaney


A Taylor Swift Inspired: Smokey Eye And Nude Lip Tutorial

edit.jpg

A dramatic eye paired with a barely there lip is a classic look with high impact. Taylor Swift often wears this combination and it always looks amazing. Today, I am going to tell you exactly what you need to know in order to achieve this glamorous makeup look. For the face:

  •  Start with applying a primer. This will help your foundation to go on smooth and last longer.
  •  Next, apply foundation. I would suggest a full coverage foundation such as Mac Pro Longwear. Don't forget to put it on your eyelids and to set it with powder, this will help your eyeshadow to stay on longer and to go on evenly.
  •  Apply concealer under the eyes and on blemishes.
  •  Set your foundation with powder. Choose one that has a full coverage, flawless finish. Smashbox Halo Hydrating Perfecting Powder is an excellent option that has a radiant, red carpet effect.
  •  Apply a peachy pink blush to the apples of your cheeks.

For the eyes:

  • Use a brow pencil to fill in and shape your eyebrows.
  •  Choose eyeshadows in the following colors: light grey, light brown/or taupe, charcoal/or black, and white. Dior Royal Khaki has a fun combination of colors that work well in creating a smokey eye. You can use the gold shimmer in that palette as a substitute for light brown.
  •  Sweep the light grey shadow on your lid up to the crease.
  •  Take the light brown color and work it across the crease and then blend slightly above the crease. Mixing in a light brown or taupe color adds depth and warmth to a palette of greys.
  •  Next, take the charcoal color and apply it to the outer corners of your eyes and blend in to the crease.
  •  Use the white color to highlight under the brow bone and in the corner of the eyes
  •  Take a black liner and line the upper and lower lash line. To soften the look you can take an eyeliner brush, dip it into the grey shadow and sweep it over the pencil line. For a more dramatic look, you can use the charcoal shadow to brush over the pencil liner.
  •  Apply false lashes. Ardell Demi Wispies would work great for this look.
  •  Apply a black, thickening mascara to your top and bottom lashes.

For the lips:

Now that you have all of the tools and steps that you need to achieve this look, its time to practice, practice, practice! Your makeup may not come out perfect the first two times or ten times! But, just remember that practice makes perfect. Once you have this look down, you are going to love it!

Happy practicing!

Rebekah


Top Ten Expert Makeup And Beauty Tips: Prom 2013

IMG_6990.jpg

As a professional makeup artist, I am continually helping clients prepare for special occasions. Today, I am going to share some of these secrets with YOU! Here are my top ten tips to looking beautiful the day of your big event! 1. Start prepping your skin a couple of weeks in advance. Get into a good skin care routine. This is crucial for your make up to look its best. Cleanse, tone, and moisturize! Morning and evening. Exfoliate twice a week. If you do not have a good skin care line just yet, visit your local department store and chat with the beauty advisors in the cosmetics department. They can help prescribe the right skincare for you. Estee Lauder has an excellent skincare line that offers a variety of products that meet the needs of different skin types. Investing in your skin is key!

2. Drink lots of water, it is excellent for hydrating your skin. Not only that, but it can help to clear up your skin and give you a healthy glow.

3. Use a primer under your foundation. This will help your makeup to go on evenly and last longer. Moisturize, prime, and then apply your foundation. Smashbox Photo Finish Foundation Primer is a great choice. A less expensive option is Sephora's Ultra-smoothing Primer.

4. Use a photogenic foundation. You will be taking a ton of pictures so you want a foundation that is not only going to last through out the event, but one that will photograph well. Mac Pro Longwear and Makeup Forever HD foundations are excellent options. A cheaper alternative would be Revlon's Photoready Foundation which can be found at your local drugstore.

5. Set your foundation with powder. You do not want your face to appear shiny in pictures. Powder sets your foundation and helps it to last longer. I recommend Mac Blot Powder, it is light weight and excellent for touch ups. A cheaper alternative would be Revlon's Photogenic Powder.

6. Wear your makeup just a little heavier than you would normally. You want it to stand out on camera.

7. Play up your best feature. If it is your eyes, do a dramatic eye and keep your lips in a neutral tone. If it is your lips, choose a lipstick shade that pops and keep the eye makeup simple.

8. Get inspired! Gather pictures of makeup looks and hairstyles that you like and start practicing! Practice makes perfect! Another option is to hire a professional. You can make an appointment at your local salon with a makeup artist and hairstylist. Call in advance to make your appointment and make sure to bring a picture of the look you would like to achieve.

9. If your skin needs a little boost of color, try a self-tanner. Make sure you exfoliate first and wear gloves when applying. St. Tropez Bronzing Mousse is a personal favorite of mine, it gives you instant color and has a natural sun kissed look. A cheaper alternative would be L'oreal's Sublime Bronze Tanning Towelettes.

10. Lastly, don't forget to wear a smile! It is your greatest accessory! If you are feeling a little self conscious about your smile, try some Crest 3D White Whitestrips. They are an inexpensive way to achieve those pearly whites!

Remember to have FUN on your big day! ENJOY the process of getting ready. Looking good starts with feeling good. YOU are going to look BEAUTIFUL! If you still have not found a prom dress, check out our blog post devoted to finding the perfect dress here! You can also visit our Pinterest Prom 2013 board here for more style inspiration.


Article by: Rebekah Miura

Photography by: Reagan Miura

City Fashion Shoot Video

This video was truly a group effort.  It was directed by Mom Powers, filmed by Delaney, and edited by Taylor Murray.  While Lakeland has some great spots for photoshoots, we loved changing it up by heading over to the streets of downtown Orlando.  This shoot features some looks that we have already posted and some that are coming up in the next couple weeks.  Hope you have a great day!

RACHEL'S FULL MAKEOVER,

mkover4.jpg

Rachel is an aspiring nurse from St. Johnsbury, Vermont. Her average look can be summed up in two words: comfy, casual. However, with Rachel pursuing her nursing degree, she is wanting to update her look to a more professional one. mkover1

Before the makeover I sat down with Rachel to hear her fashion likes and dislikes, in order to create a look that would fit her unique style and personality. Rachel expressed having a difficult time finding modest apparel, that fit her figure well. Her solution was purchasing sizes that were too big. With this in mind, Rachel and I visited a couple different stores in pursuit of a brand that would work well with her specific body type. In her case it was Old Navy.

mkover3

For Rachel’s outfit, I chose a collared shirt and blazer combination. I paired it with a dark wash jean, which is an excellent way to keep the outfit business casual without looking too stuffy.


mkover2

For the hair, we chose a style that would be well suited for her “on the go” lifestyle. This simple bob can be styled with minimal product, tools, and time.

mkover5

For the make-up, I kept it simple and natural. Rachel could easily pull this look off in just a few minutes. The foundation is light-weight, and looks great paired with a cream blush. For the eyes, I used a palette of greys and taupe. For the lips I chose a wine color, which keeps her look up to date and on trend.

mkover7A statement necklace adds personality to the look; bracelets and a jeweled toned ring compliment it well. This look highlights Rachel’s amazing figure without compromising her value for modesty. You do not have to drown in oversized clothing to be modest. Finding the right line of clothing, that works with your body type is key.

mkover6

Rachel looks ah-mazing in her new modest, professional look. With a newly trained eye in choosing professional pieces that work well with her lifestyle, personality, and body-type, she is ready to confidently enter into the next season of her life.

Shirt: Old Navy, $29.94,  Jeans: Old Navy, $29.50,  

Necklace: Old Navy, $12.00, Rings: Old Navy, $8.00, Bracelets: Old Navy, $8.00 (Jewelry can NOT be purchased ONLINE at this time.)

Foundation: SKINN plasma foundation, $64.50,  Powder: Estee Lauder, Lucidity, $29.00,   Blush: Eve Pearl, Eyeshadow: The Estee Lauder Shadows that were used are discontinued. A palette similar is the Film Noir from Estee Lauder, $48.00,  Eyeliner: Urban Decay, 24-7 Glide On Pencil, $19.00,  Lips: SKINN, $54.98  Mascara: Eco Bella, Flower Color Natural Mascara in black, $17.95, 


Photography: Reagan Miura

Article by: Rebekah Miura

Haircut by: Erin Herren at John Josephson’s Salon


A Ciaté Giveaway

IMG_6086WM1.jpg

Every girl loves beauty products; especially free ones! That's why we are pleased to announce our very first giveaway is a Ciaté Velvet Manicure Set! If you aren't familiar with Ciaté products, you should be. They are known for nail polishes with textured finishes and dynamic colors. A $20 value, this set includes a 0.45 oz Paint Pot Nail Polish, Crushed Velvet Powder, Little Black Brush and a Clear plastic tray. We're excited to hear from you and see who wins!

There are a few ways to enter. If you choose to enter through posting on the blog, be sure to comment directly on the blog post at the bottom of this page. For extra entries, tweet each day about the contest and where you plan on wearing the nail polish.

a Rafflecopter giveaway

Buttons & Brushes for Samii

IMG_8746WM.jpg


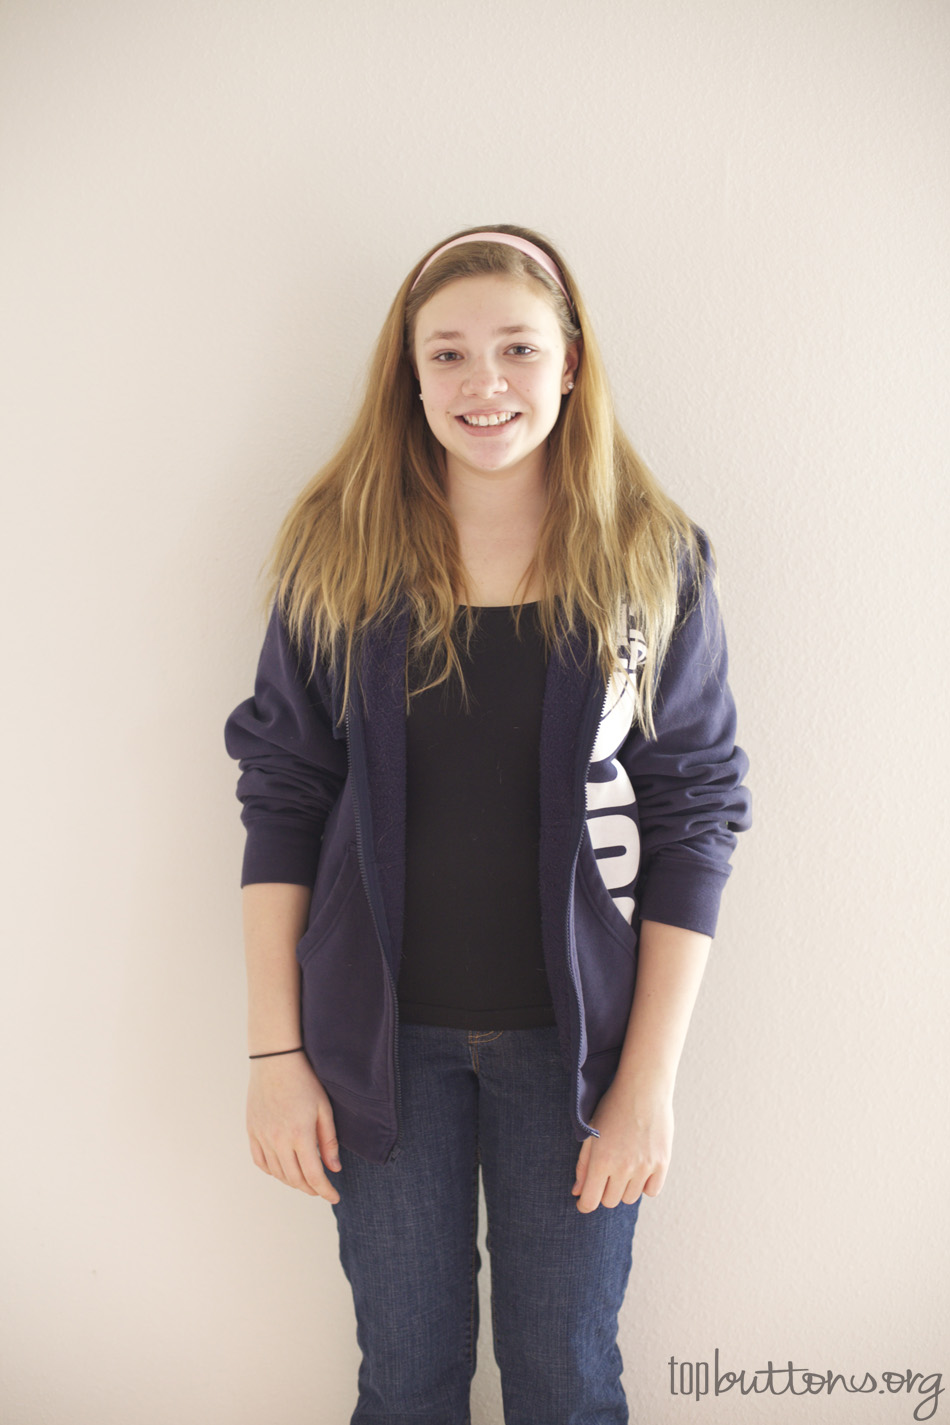
Meet Samii, a 14 year old Gilmore Girls fan from Kansas City, Mo. She is down to earth, adorable, and wise beyond her years. When I asked her to share her thoughts on modesty she spoke with grace and clarity saying, “Modesty reflects your character.” Samii spoke to me about how your inner beauty is just as important as your outer beauty. She believes that you need to spend time and invest in both. Samii also said that your clothing reflects who you are on the inside. “If you are dressing inappropriately it doesn’t give the right message of who you really are.” Well said, Samii.

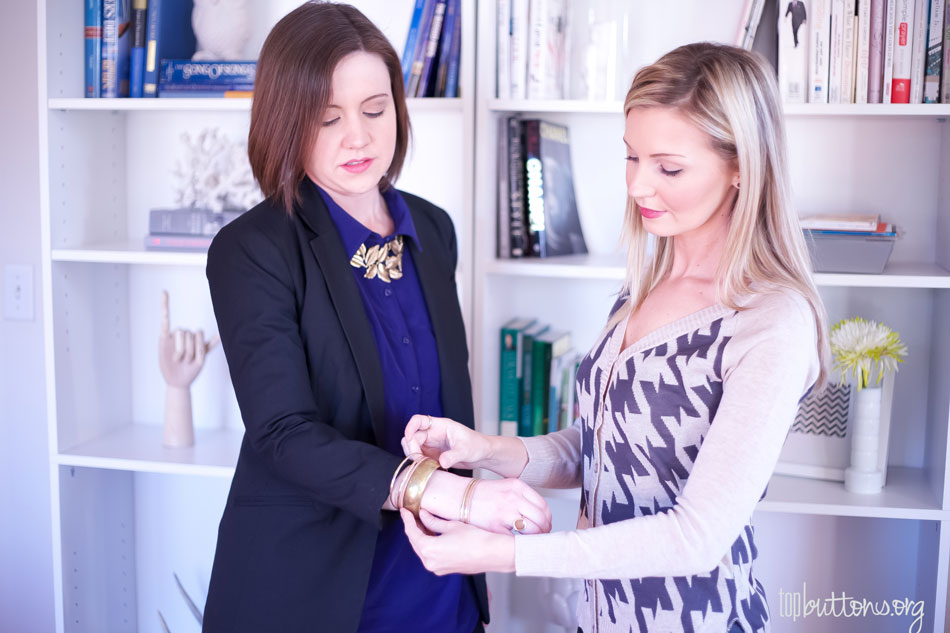
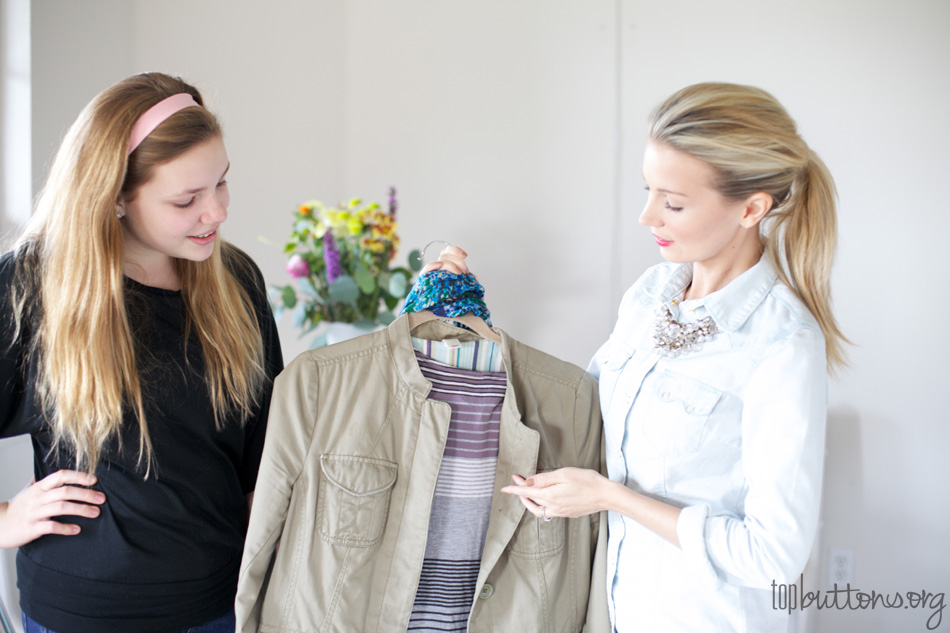
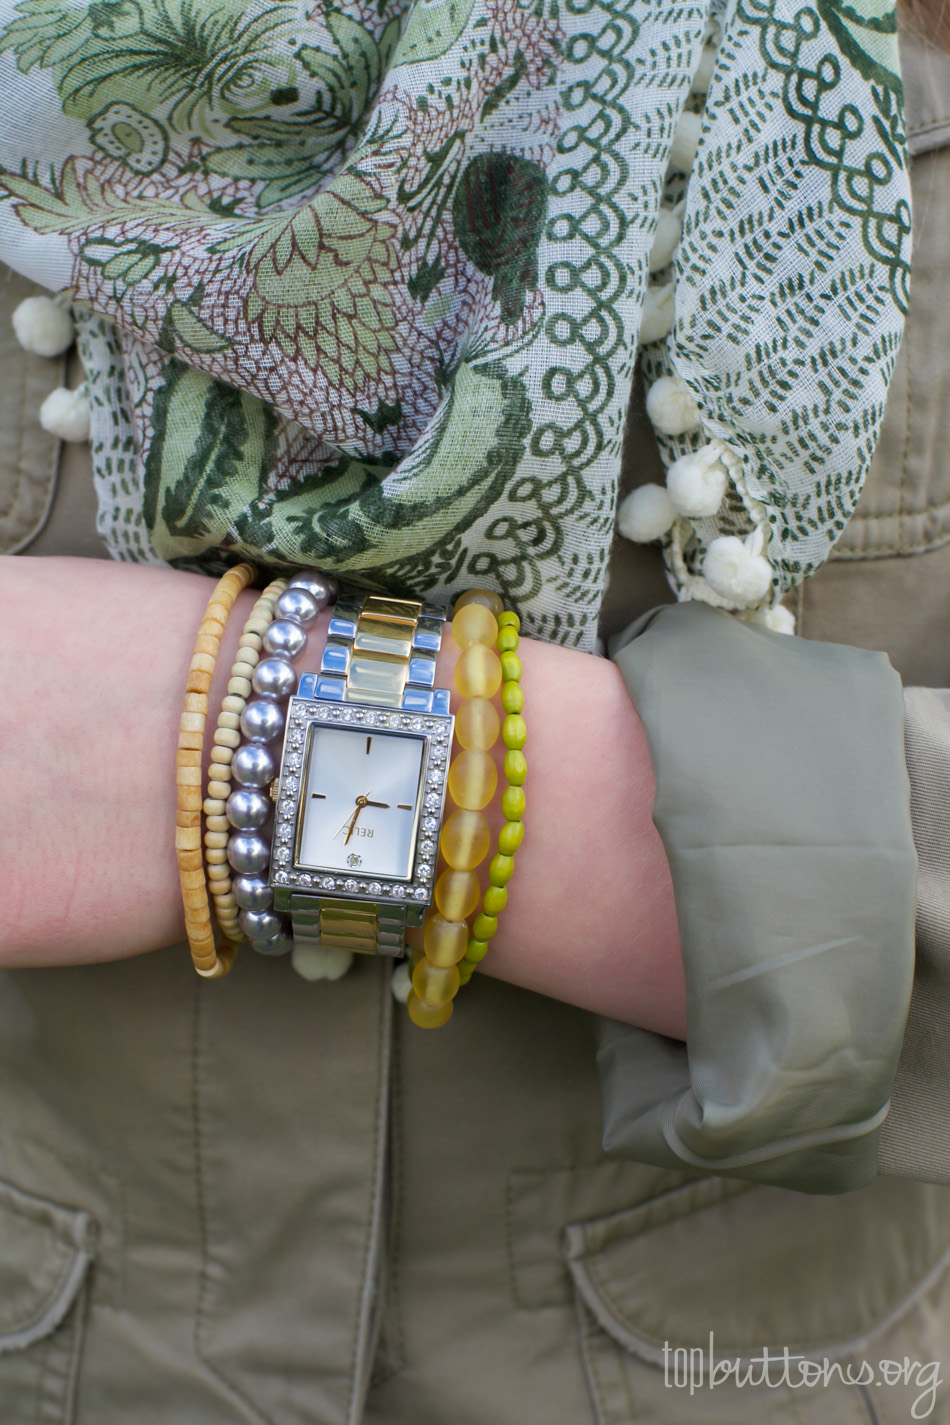
Before the makeover, I spent some time with Samii to hear her thoughts on fashion. I wanted to work with her in creating a look from her own wardrobe that would reflect her unique personal style. When chatting with Samii, she shared that some of her style icons were Jennifer Anniston, Reese Witherspoon, and Julia Roberts. She appreciated their simple, yet stylish look. In spending time with Samii it was clear that she loves the natural, classic look. So when going through Samii's closet for her makeover, I pulled a nice structured jacket and paired it with a classic striped top, skinny jeans, and baby doll flats. I accessorized the look with a patterned scarf, some small gold earrings in the shape of a flower, and of course an arm party! I wanted to stay true to Samii's foundation of simple style, but also incorporate some fun accessories to add a youthful touch.

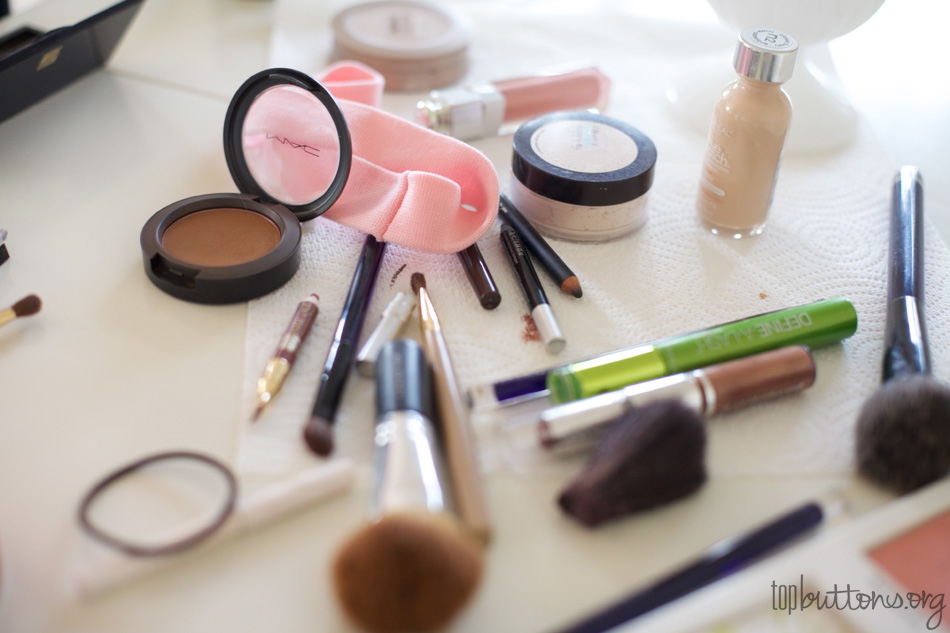
For her make up, I kept it natural. I used neutral brown tones on her eyes and soft pinky browns for her lip and cheek color. Samii has naturally beautiful skin so I applied a thin coat of foundation and set it with a sheer powder. I also used bronzer to define her cheekbones, and add a little warmth.

Also used:  Maybelline “Define A Lash,” Very Black

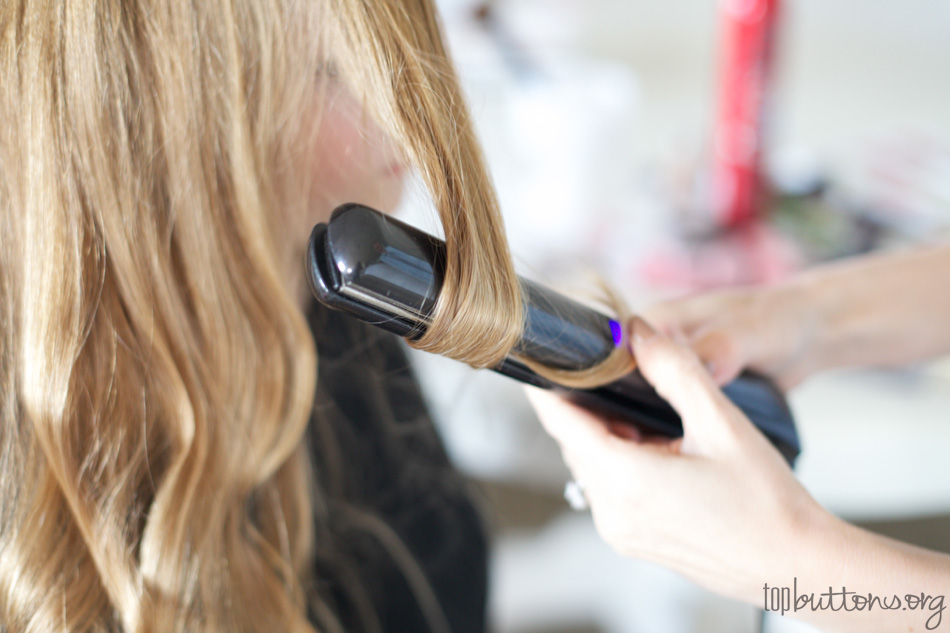
For her hair, I did loose curls. I wanted to bring a little sophistication to her look, but at the same time keep it fun and playful.

Samii looks beautiful in her new classic chic look!

Photos and story by: Rebekah Miura

GLAMIFY YOUR HOLIDAYS

Beauty-Stocking-Stuffers.jpg

Here are some treats that you can use to glamify your or a friend's holiday season. This gift list provides products that can all fit perfectly into a stocking as well as make for cute single gift ideas. So, now there’s no excuse not to have a fabulous gift for Secret Santa and Christmas parties alike. 1.Lip Stick Duo 2. Brush Set 3. Peppermint Lotion 4.Its-a-10: conditioning spray 5. Mini Straightener 6. Snap Happy: Nail Polish

7. Silver Glitter: Nail Polish 8. Starry Eyes: Liquid Eye Shadow


Beat The Rush: Black Friday Deals

Black-Friday-Ads-2010.jpg

My Black Friday planning began this morning at 6:30 am when the ads arrived on my Aunt's doorstep! We quickly scanned the ads for things that we had in mind for gifts for family and friends, and then of course planned our map and spreadsheet for where and when we would arrive at each location.  


The most important part about Black Friday shopping is making a plan. When making my plan, I like to look at the ads with low prices on items that I have kept myself from buying during the year, and things I might wear for the winter season. This year, I will share with you my favorite picks for makeup, clothing, and shoes that you can find at low-budget prices!

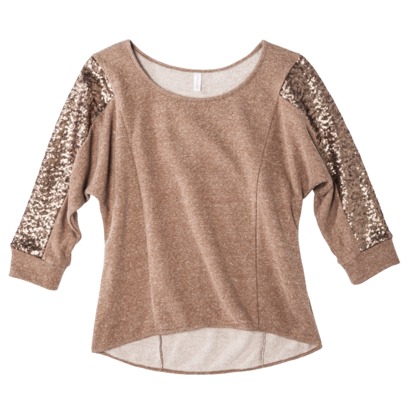
Xhilaration Juniors Sequin Fleece Top-Assorted Colors- Featured Above: "Rust" $10.00 (Find at Target: Opens at 9pm on 11/22)

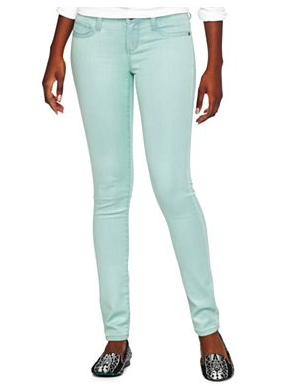
Decree Radiant Metallic Skinny Jeans- Featured Above "Mint" $15.00 (Find at JCPenny: Opens at 6am 11/23)


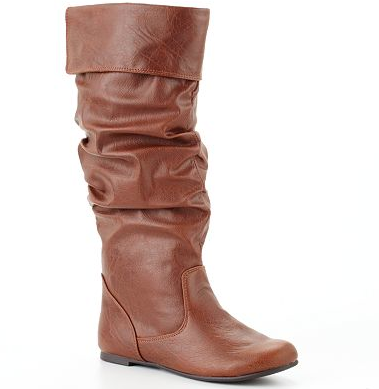
SO Tall Boots Juniors- Featured Above in Brown $19.99 (Find at KOHLS- Opens at Midnight on 11/23)

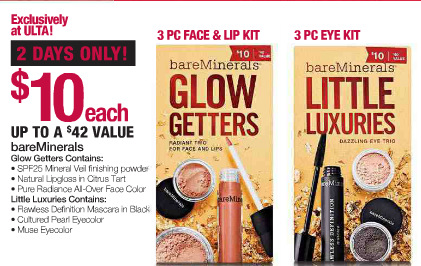
bareMinerals Glow Getters Radiant Trio & Dazzling Eye Trio $10.00 each (Find at ULTA Beauty- Opens at Midnight on 11/23)

These are just a few of the items that I will be purchasing tonight/tomorrow! If you would like to be a Black Friday Fashionista but don't want to wake up early, I will link some of my favorite websites and ads below for easy online Black Friday Shopping!

Old Navy Use Coupon Code TURKEYDAY for online check out.

Forever21 

Gap

J.Crew 

Happy Thanksgiving and Happy Black Friday!


Beauty Wednesday: Bold Brows

BeautyW.jpg

Eyebrows can be a trivial subject for most girls. To wax or not to wax?

What are eyebrow pencils anyways?

Can grooming my brows actually show case my eyes?

What are bold brows?

Where do I even begin?

These questions can haunt us in a world where the options are limitless and the products vast. Fear not, your soon to be bold brows! Plenty of products and techniques exist that can assist you on your journey to bold brows. So don't envy other women's brows; create your own by getting to know your brows. Your first step in your new found relationship with your eyebrows begins with identifying  your eyebrow shape and size.


My brows are a mixture between Hi - Lo Brows and High Arched Brows. My size is rather normal; not too thick or thin.

After identifying your eyebrows, notice that your options become more narrowed when it comes to products and styling. Second step closer to bold brows is picking your products.

Personally, some of my favorite products to use on my brows are Beautique's eyebrow pencil in soft black and Maybelline's Great Lash clear mascara . 

Use the eye brow pencil to define your brow shade and brush them together neatly. My eyebrows are black. Applying clear mascara will help to keep your brow hairs in place.

Now that you've gotten to know your brows a little better you'll notice the great thing about your brows is showing off your eyes. Eyebrows frame the eyes so don't forget to give them a little attention during your daily beauty routine!

Now you are all set to empower your brows to be bold!

-Kayla Danielle


Photos and Story by Kayla Danielle

Beauty Wednesday: The End of Split Ends

BeautyW_HAIR.jpg

Color treated and heat damaged hair has never failed to produce unmanageability, dryness and most importantly split ends. Personally, as a hair and beauty enthusiast, I love to style with heat and experiment with products. Some of my friends like to call me their expert without a license, but one of the largest issues that I've run into with using heat and color on my hair is the damage that it leaves behind over time. Split ends are hard to defeat, heal or even avoid. Luckily, after spending years coloring and cutting my hair, I have discovered three products and three rules that have protected, restored and/or healed my hair from damage.

Rule 1#:

When straightening, section your hair off and only straighten each section once

(this way you avoid exposing your hair to extreme heat multiple times in one sitting).

Rule 2#:

When conditioning, always leave in conditioner for a minimum of 3 minutes before washing

(this lets the moisture soak in to your hair allowing proteins to be deposited).

Rule 3#

Have the ends of your hair trimmed professionally at the very least every 6-12 weeks

(this ensures that your dead ends are put to rest).

Must Have Products to Help End Split Ends:

Its-a-10 Miracle Shampoo plus KeratinAussie 3 minute Miracle Deeep ConditionerArgan Hot Oil Self Heating Hair Treatment

Follow these simple rules and expect great results!

- Kayla Danielle
Written and Photos by: Kayla Danielle